Casa de ‘Not lovin’

So for those that follow this blog, you will all notice that there has been a long break in updates. Sometime last year I fell out of love with our old house. Enough so that I convinced my husband that we should sell it. It had felt too hard trying to make friends in our area. I was tired of the constant work needed to make this old house somewhere I wanted to be. We literally almost killed ourselves trying to get our house on the market this summer. Summer came and the work wasn’t done. Our daughter enters kindergarten this fall and we were starting to hit the point of knowing that we would be starting her in school down here and then moving her to a new school a month or two into the year. This started feel like a really bad idea and wasn’t something I wanted to put her through.

We made the decision to hold off till next summer and re-access at that point. Then we settled in for a little bit. I noticed how much nicer everything was. How much more it felt like a home. Then we hosted for the 4th of July, and everyone came. All the friends that we have made in the last 6 years. All of our friends from our neighborhood that we wanted to move back to. Then I realized that we could combine the two. That we would actually be losing something if we did move away.

I got a little bit of the love back. I don’t know if we are going to stay after next summer. But what I will say I like our house more than I have in a long time. I am enjoying the improvements that we have made and I am having fun doing new ones. So look forward to more posts, and seeing the improvements we have made and are making.
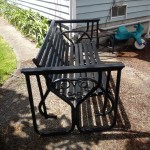
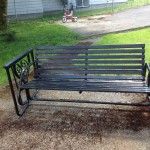
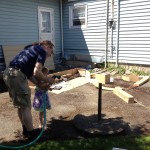
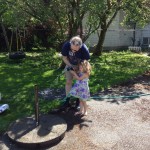
Our past
IMG_0637

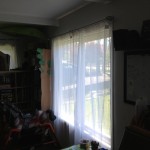
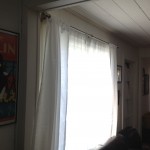
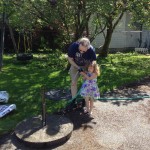
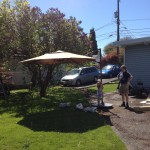
And now to our future.

The yard

We have been working on cleaning up our yard since we bought it. Here are links to the before and afters. We still have a long way to go, except now it’s more beautification than anything else.

Before

After

If I could lift my arms I would pat myself on the back..

I have really been struck lately that the work that we are doing on the house lately feels a lot more enjoyable. For years in this house it was fixing dangerous things that the previous left behind. It was expensive and frustrating. It was years of ‘have to’.. Have to fix this, have to repair this, have to get this debris taken out..

Now if feels like we are starting to do things that we are enjoying. We are changing the way we look at our home and appreciating it more. It feel less ‘I hate that we have to do this!!!’ and more ‘Look how awesome that is!’

We have a chainlink fence that I really dislike, but replacing it is so far down the list I can’t even fathom doing it. The handrail coming down into the yard was all rusted. It started out with me painting the handrail, then I painted the gate, I thought it looked beautiful.

Then I looked over and saw that a cast iron bench I owned was looking a bit shabby.

FIXED IT!

I was showing off the gate to Bryan and he casually mentions that it would look nice if we painted the entirety of the front fence. I did some research and got a deep-napped roller and managed to cover most of the fence and me in paint.
But it looks awesome!


It’s about as pretty as you can make chainlink.

Then last week I found a bench swing that was in pretty rough shape. Bought it and it too got the shiny-azations!

I laughed with the husband this weekend that everything at the house was going to eventually be black and shiny, once a goth always a goth. 🙂

Sometimes you have big improvements

And sometimes it’s little tiny steps that make your home better. We have two large picture windows that had blinds that were left in the house from the previous owner. I have always hated blinds. They are ugly and.. well ugly. I wish I could find the words to discuss my hatred but it’s irrational and who can put that sort of thing into words. Something always took priority over spending the money on the rods and curtains. It adds up so very fast.

But this weekend I put my foot down and my house is more beautiful because of it.

Also this winter we took down our pear tree which we knew we wanted to add in some shade structures if we actually wanted to be able to host anything in the summer. So my husband but everything together with some assistance from our four year old.

It was easy to assemble, seems sturdy, has little lights and a solar panel. You can get it from Bed Bath & Beyond.

We are also getting a long rectangular structure that we hope to be able to leave up over winter too so that the kiddo can play outside more even on rainy days. Not that I think that she will melt but I would like somewhere to hang out too.

I am having a hard time because we have decided not to do any big projects but I am being project nickled and dimed. The only person putting the pressure on myself to be consistantly doing something is me. I know that in the end I immediately benefit from the work we do, but I envy those homeowners that are more than happy just to reside in their home and not constantly be poking it with a stick. It just never stops.

I just need to work harder on finding a healthy balance.

Recent Developments

First, a couple of months ago, I cut down our pear tree. The pears were terrible (although a neighbor who knew the twice-previous owner says they used to be great), and we had to spend the whole late summer and fall picking the damn things up or else the yard smelled like a brewery. The yard looks so much more open now, but we’ll have to get a shade structure for July 4. Unfortunately, while we got rid of the logs (and I kept a big chunk for woodworking someday), we’ve still got a huge pile of sticks and branches in the back driveway waiting for the day we can rent a chipper. Then we have mulch. Lots of mulch.

IMG_0188

Second: for months Jen has been bugging me to put a safety railing around the basement access stairs, so that little girls playing in the back yard wouldn’t risk falling in. I finally had the time and cash to do it. Unfortunately it was pouring rain the whole weekend.

Here’s the original situation, with the chicken wire fence I originally put up as a stopgap a couple of years ago:

IMG_3780

Here’s the materials: two 8′ cedar fence panels and six 8′ pressure treated 2x4s, as well as gate hardware and deck screws. (I love deck screws, especially the ones with the specialty head that doesn’t cam out, and I will never never try to use those zinc-plated Home Depot screws again. Ever.)

IMG_3782

Holes are dug for the fence posts, about 20″ deep.

IMG_3787

The fence is assembled. I was able to do most of this on the shed/workshop floor out of the rain, but of course I mismeasured slightly so I had to go back and re-cut the ~2′ piece that extended the 8′ panel.

IMG_3788

According to Roger Cook, burying a length equal to 1/3 of the fence height should anchor it sufficiently, but I had a bucket full of concrete mix sitting around, so I poured it into the holes.

IMG_3789

And here’s the fence put up, with the holes filled in. It only wiggles a little bit, well within tolerable limits.

IMG_3790

I knew I would have to put the gatepost against the wall instead of suspending it off the end of the fence, but the downspout as built by Bob the Handyman way back when we bought the house was in the way. So I bought some tube and elbows and diverted it.

IMG_3793

And here’s the gatepost, built up out of 2x4s. And that’s where I ran out of time (and energy, having been working out in the rain all weekend).

IMG_3794

The following week, I was able to put up the gate. Unfortunately, the pickets did not fall in a good pattern for the necessary gate width, so I pulled them all off the rails and re-spaced them. Again, Home Depot screws suck, but I happen to have a box of galvanized roofing nails just the right size and used those to put the thing back together. Attaching the hinges and gate hardware was straightforward and easy.

IMG_3840

Last: the next weekend I replaced our faucet. Not only did the old one drip like crazy, but the replacement sprayer leaked whenever the faucet was on, causing a water-hammer-like shudder in the flow. So I looked around Home Depot for a better one, that had a single handle, ceramic cartridge, and pull-out sprayer, at a decent price.

IMG_3859

At first I installed it with the handle to the side like in the show model, but only after it was completely installed did I realize that the faucet was too close to the backsplash to allow for full motion of the handle. I took the whole thing out again and was about to pack it up and exchange it for a different model, when I noticed that there were little alignment flanges on the bottom that allowed for the handle to be in a front position as well as a side position. So I put the whole thing back in again.

Of course I got wet, and my arms got sore from working in gorilla-arm position, and at some point I dropped a screwdriver from arm’s length onto my forehead. Ow.

Next: Even though we’re planning to get rid of the garage, in the short term we want to keep the animals out, so I have to close off the old rotted garage door. I’ve had the composite panels since last summer, but I picked up the 2x4s at the same time as the gate stuff.

IMG_3785

I also got replacement siding to fill in the holes around the new windows and where I closed in the door from Thekla’s bedroom. It doesn’t quite match the 1930(?)-vintage siding on the rest of the house, but at least it won’t be tarpaper. I really want to rip all the siding off the house — vinyl and otherwise — and replace it with Hardiplank, but that’s going to be a long time from now.

Tags: , ,

The great house switcheroo! (wife post)

We are a home that likes to entertain. We have a monthly tea. We host the holidays. We like having playdates. One of the things that I had really missed from our old place was hosting movie nights. We have a tight little area where we had our television. The two times we have hosted others to see a movie it was really cramped and uncomfortable. So I was looking at our different options and suggested something to Bryan and I honestly thought that he would never go for.. switching our media area and library from one side of the house to the other. I thought he would call me crazy and just shoot it down. We have eleven bookshelves full of books. My movie shelves came from a blockbuster that was closing out.. and we still have an overflow. But he thought about it for about a day and agreed that while the work involved would be huge, it was a great idea. So we went from:

The chaos!!

To the result of 4 days hard work

Bryan is more comfortable stretching tasks so that you are doing a reasonable amount at a time. I don’t have that sense, once a project is started, my crazy goes into high gear till it’s done. And once I start on one room it usually tears through the whole house till everything shines.

But now the house is really feeling like somewhere we can entertain with ease.

Now it’s really done,

Yes, Bryan is the man when it comes to building, drywall, electrical.. you know.. the hard stuff. I am the queen of decorating and the bits and bobs portions of finishing a room. Though I had wanted to keep the room fairly gender neutral, when my daughter was given choices it led to more and more pink everything.

What you are about to see is what happens when you let three year old girls have a voice in room decoration.

It’s the room of pink fluffy cupcake eating sparkly unicorns of doom,

and then some.

You may want sunglasses.

I blame Pinkie Pie.. She’s Thekla’s current hero.

Upcoming Projects

Here’s a list of smaller projects we’re contemplating for the near future. No particular order.

  • Finish work on hallway
  • Clean and organize basement
  • Build pergola roof
  • Seal up south shed windows and doors, run electricity to it, set it up as workshop
  • Wall in north shed rotted-out garage doors, replace rotted-out and falling-off person door
  • Run temporary lights and sockets to basement
  • Waterproof leaky parts of basement
  • Till and seed south raised area

Larger projects:

  • Replace the roof (we already have a contractor and estimate, just need to pull the trigger on it)
  • Build porch and re-route front entrance to existing closet (turning it back into a foyer/mudroom again)
  • Turn addition into master suite (this can be done in stages with the bathroom coming last)
  • Bump out back wall and enclose basement stairs into building envelope
  • Smart wire the house and create tech hub
  • Gut and refinish the library and living room
  • Retile the fireplace

“Someday” projects:

  • Finish basement, create laundry/plumbing room
  • Redo all the supply plumbing with PEX and a manifold system
  • Knock down the existing sheds, extend the foundations, and rebuild as garage & cottage
  • Replace forced air heating with radiant
  • Add a second story to the addition
  • Build a better patio
  • Redo the kitchen

Not that I’m going to be starting any of these right away, except maybe cleaning and organizing the basement. I really need a break.

Jen adds Yard Projects:

  • Clean out top bed and ready it for arborvitae planting
  • Continue building up the raised beds
  • Set the initial plans and start building my perennial garden
  • WEED! Oh goodness I need to weed. My beds are horrifically overgrown
  • Cut down strange bush/tree covering the library window

Tags: , , , , , , , , ,

Stick a fork in it…

The @#$%@# bedroom is done. Well, almost done.


(The toxic pink curtains were my daughter’s idea — Jen showed her five different colors at the store and she picked that one. Also, the last photo shows the plexiglas protector to prevent the annoying orange cat in photo #3 from scratching holes in the corner again.)

Next on the agenda

  • Apply border
  • Wall plates for the plugs
  • Install door jamb and bifold doors for the closet
  • Install prehung bedroom door
  • Install window jambs and sills
  • Install casings 
  • Patch floor where old wall floor plates used to be
  • Fill and paint nail holes
  • Touch up painting
  • Install plexiglas corner protector
  • Clean old linoleum mastic off the floor
  • Move my daughter and all her stuff in
  • Cut hole and install heat vent

I’m not sure what I was doing wrong with the baseboards, in that there’s lots of gapping between the baseboard and the drywall. Is that something I should just caulk and call it good, or is there a better technique? Coping the corners wasn’t too hard, since I had a very simple profile, but I should buy an actual coping saw for the next time I do it.

I do know that I almost certainly won’t be using MDF for casings in the future. Yes, it comes pre-primed, but the primer doesn’t do all that great a job of holding the final coat of paint. Also, the edges aren’t square, it’s hard to plane, it doesn’t really hold screws very well, and it tends to bulge up around the finish nails (where wood doesn’t).

Now all I need to do is buy an inexpensive jigsaw so I can cut a hole in the floor above the existing heat duct for a vent grille. Which I should do soon, but which isn’t really necessary before I move my daughter into the room.


Tags: , , ,

Casings!

… and sills and jambs and doors and floor patches (oh my).

Lots of progress since the last post.

Two weeks ago I got the prehung door in, which was a bitch and a half to do solo. I plumbed it up and the door wouldn’t close. It’s a solid MDF core semi-custom Jeldwen door, so it’s pretty heavy. I had to do lots of adjusting and re-shimming to get the door to swing shut, and I didn’t realize until just yesterday when I was putting the casings on that it was actually seriously out of plumb, because the door was sagging in the frame on the top hinge. Once I did the thing with the long screw into the framing, it squared right up and I was able to re-adjust the frame so it was plumb. A little loosening of the screw adjusted the door so the latch would go into the strike plate. It’s a little tough to close, but completely within acceptable limits.

The closet door jamb was easy by comparison, and hanging the bifold doors was a snap. Unfortunately, they’re basic unfinished slab doors which suck down the paint, so I’m going to have to give it a third coat (at least) so as not to see dark wood grain through the white.

I also built the window jambs and sills. This proved to be difficult. I’m using MDF, so it doesn’t plane very well, so I had to resaw the boards to narrower and narrower widths on the table saw to get them to fit property. And for some reason I couldn’t get them tight to the window, so there’s about a 3/32″ gap that I’ll need to fill in with caulk.

Last weekend I built all the lintels. I knew I wanted to do a keystone design, but the problem was how to get a three-piece lintel to have nice tight joints and all be on the same level plane. I’ve been planning on getting a pocket hole kit for eventually doing built-ins and cabinets, so I went ahead and ordered this one and used it to mate up the lintel pieces with the keystone. I made a jig to make it a repeatable process, which I’ll keep around to make more in the future.

Yesterday I got the nailgun back out and put up all the door and window casings in the bedroom (I still have to do the simple casing on the inside of the closet).

The door and window casings in the hall will have to wait until I can saw or plane off a quarter inch of the existing jambs. They were built to be even with the old 3/4″ tongue-and-groove planks, so now that there’s 1/2″ drywall there’s too much jamb. Planing seems like it would take forever, but I’m not sure how to get a controlled saw cut. Maybe I need to buy a jigsaw.

Next week I clean up enough sawdust around the edges to put on the baseboards. I’ll be using 1/2″ x 5 1/2″ MDF boards, but I’m thinking that a square edge on top will be boring and tend to collect lots of dust, so I think I’m going to cut the top at a 45° angle. Yay tablesaw!

Also, back when the room was still open framing, one of our cats liked to use the closet corner as a scratching post. Unfortunately, the mere existence of drywall and paint on that corner didn’t discourage him, and he scratched a hole in the paint. I sanded it, patched with patching compound (I also patched the socket cuts where the hole was too big for the plate), and primed. When I do touchup painting, I’ll paint them, and then screw 4″ of plexiglas on each side up from the baseboard to higher than he can reach. Damn cat.

Jen’s had some luck in using mineral spirits and Murphy’s Oil Soap to get the mastic off the floor, starting in the hall. But nothing else we’ve tried so far has worked as well as the time I unknowingly spilled a bottle of air compressor oil on my way out of the room and left it there overnight. So maybe we’ll just get a big bottle of light oil, mop it onto the floor and clean it off the next day. Seems plausible. Right?


Next on the agenda

  • Apply border
  • Wall plates for the plugs
  • Install door jamb and bifold doors for the closet
  • Install prehung bedroom door
  • Install window jambs and sills
  • Install casings (mostly)
  • Patch floor where old wall floor plates used to be
  • Fill and paint nail holes
  • Touch up painting
  • Install plexiglas corner protector
  • Clean old linoleum mastic off the floor
  • Move my daughter and all her stuff in

P.S. Our friend Erin came over and painted clouds on the blue-sky ceiling. And they look gorgeous.

Tags: , , , , ,