Archive for category Stairs

Recent Developments

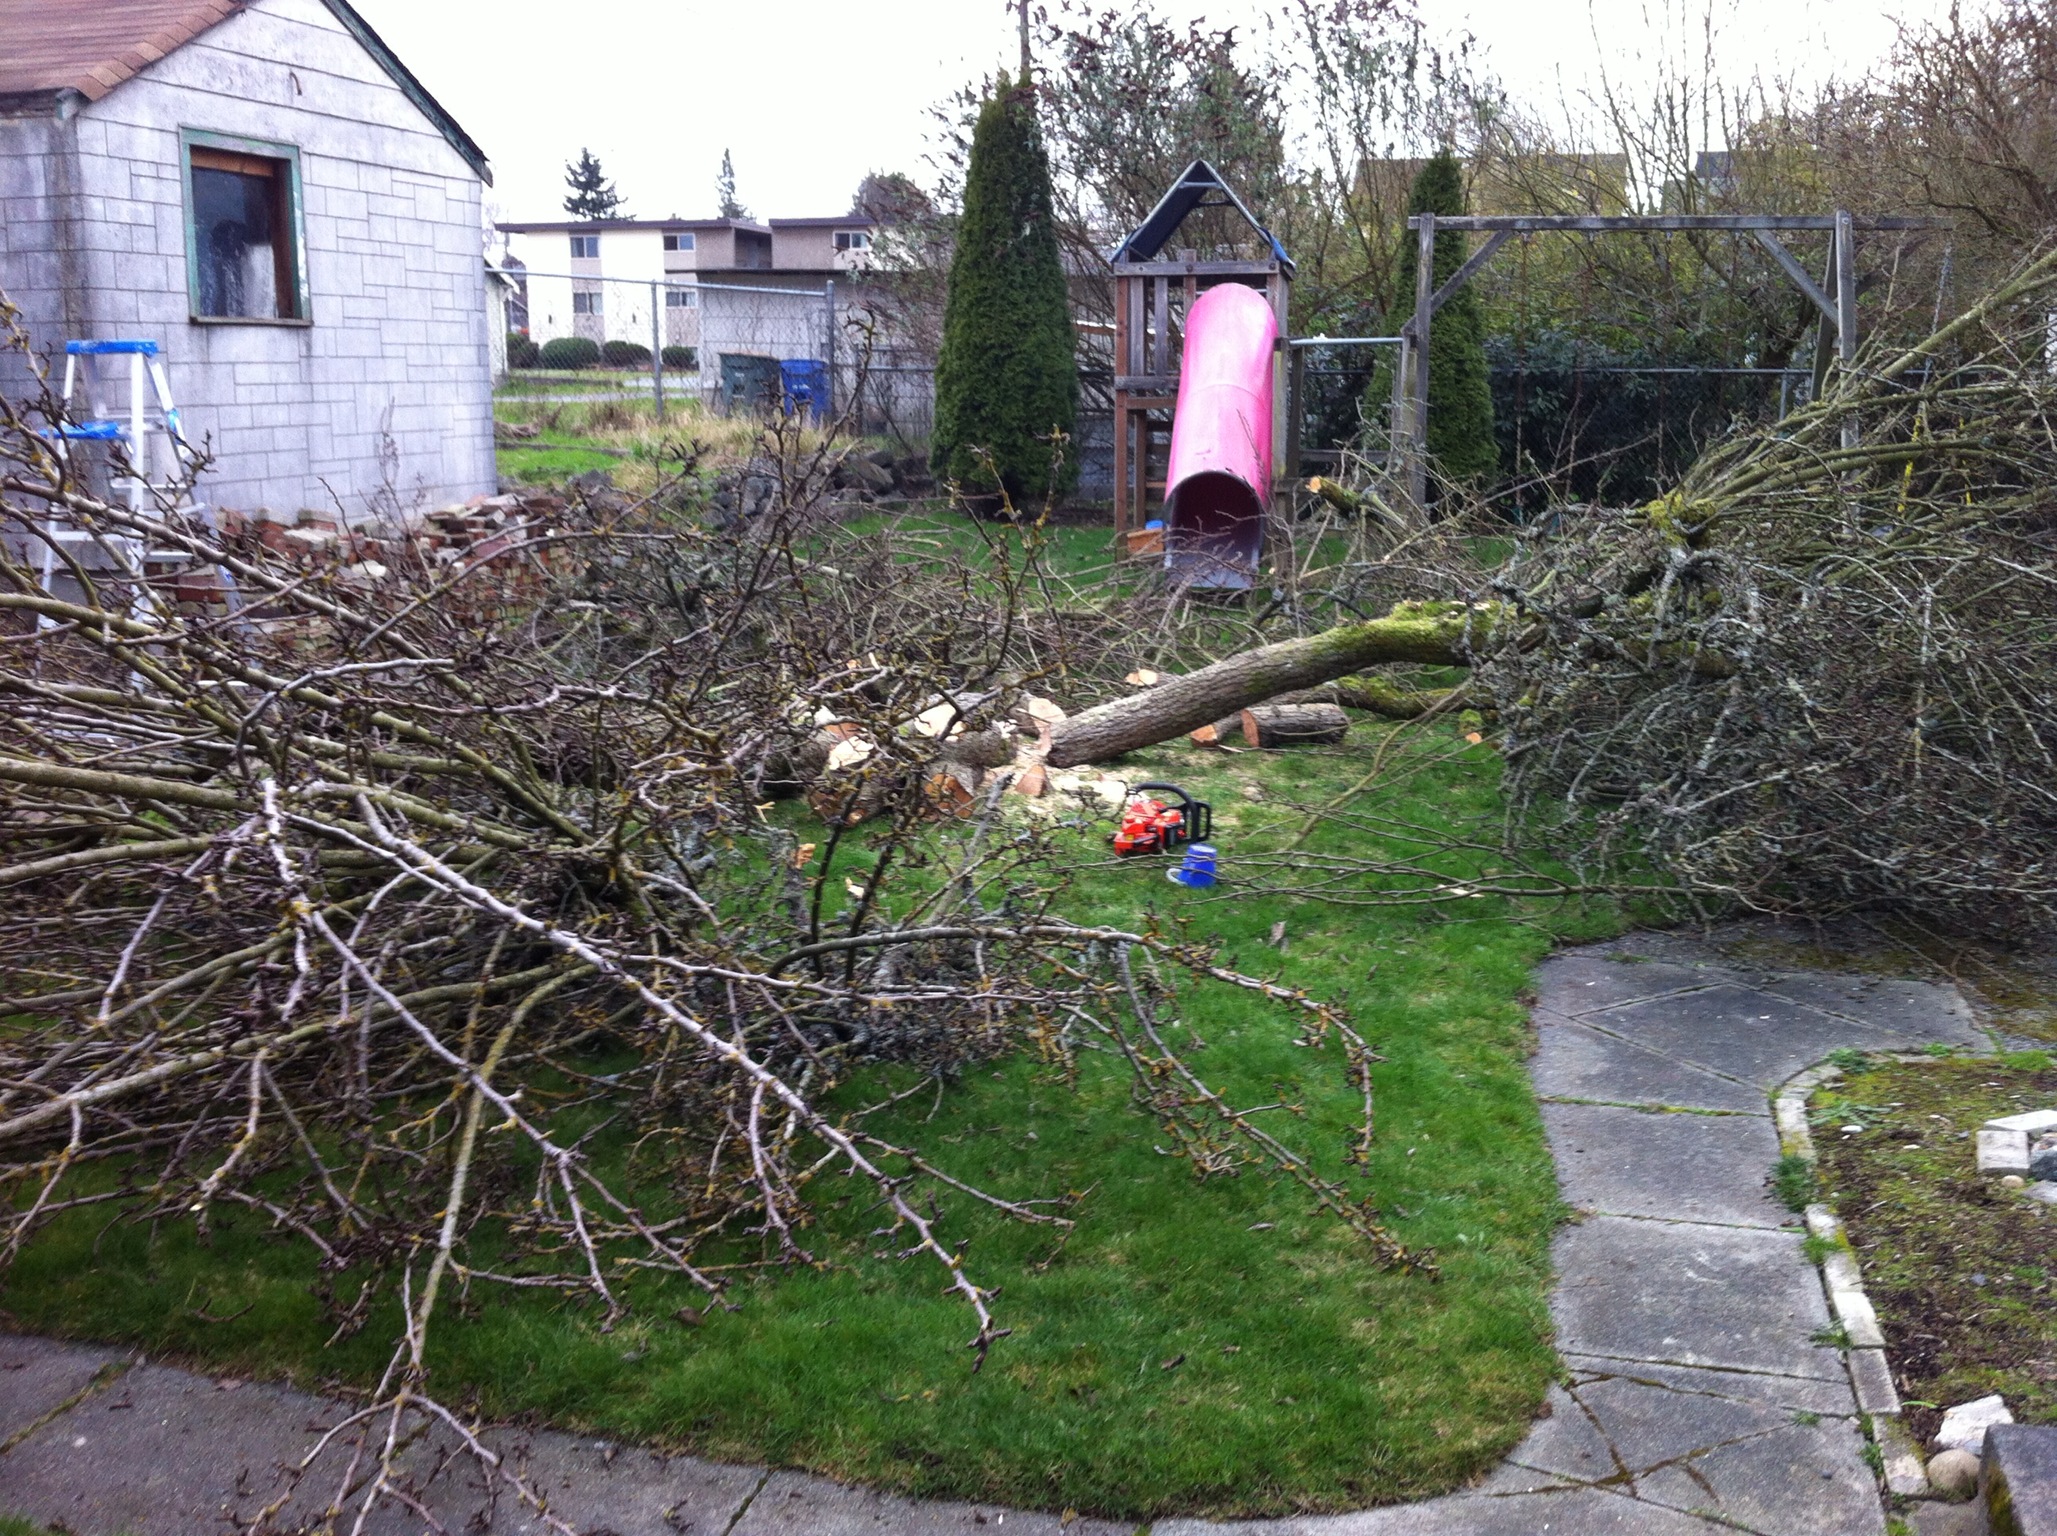
First, a couple of months ago, I cut down our pear tree. The pears were terrible (although a neighbor who knew the twice-previous owner says they used to be great), and we had to spend the whole late summer and fall picking the damn things up or else the yard smelled like a brewery. The yard looks so much more open now, but we’ll have to get a shade structure for July 4. Unfortunately, while we got rid of the logs (and I kept a big chunk for woodworking someday), we’ve still got a huge pile of sticks and branches in the back driveway waiting for the day we can rent a chipper. Then we have mulch. Lots of mulch.

IMG_0188

Second: for months Jen has been bugging me to put a safety railing around the basement access stairs, so that little girls playing in the back yard wouldn’t risk falling in. I finally had the time and cash to do it. Unfortunately it was pouring rain the whole weekend.

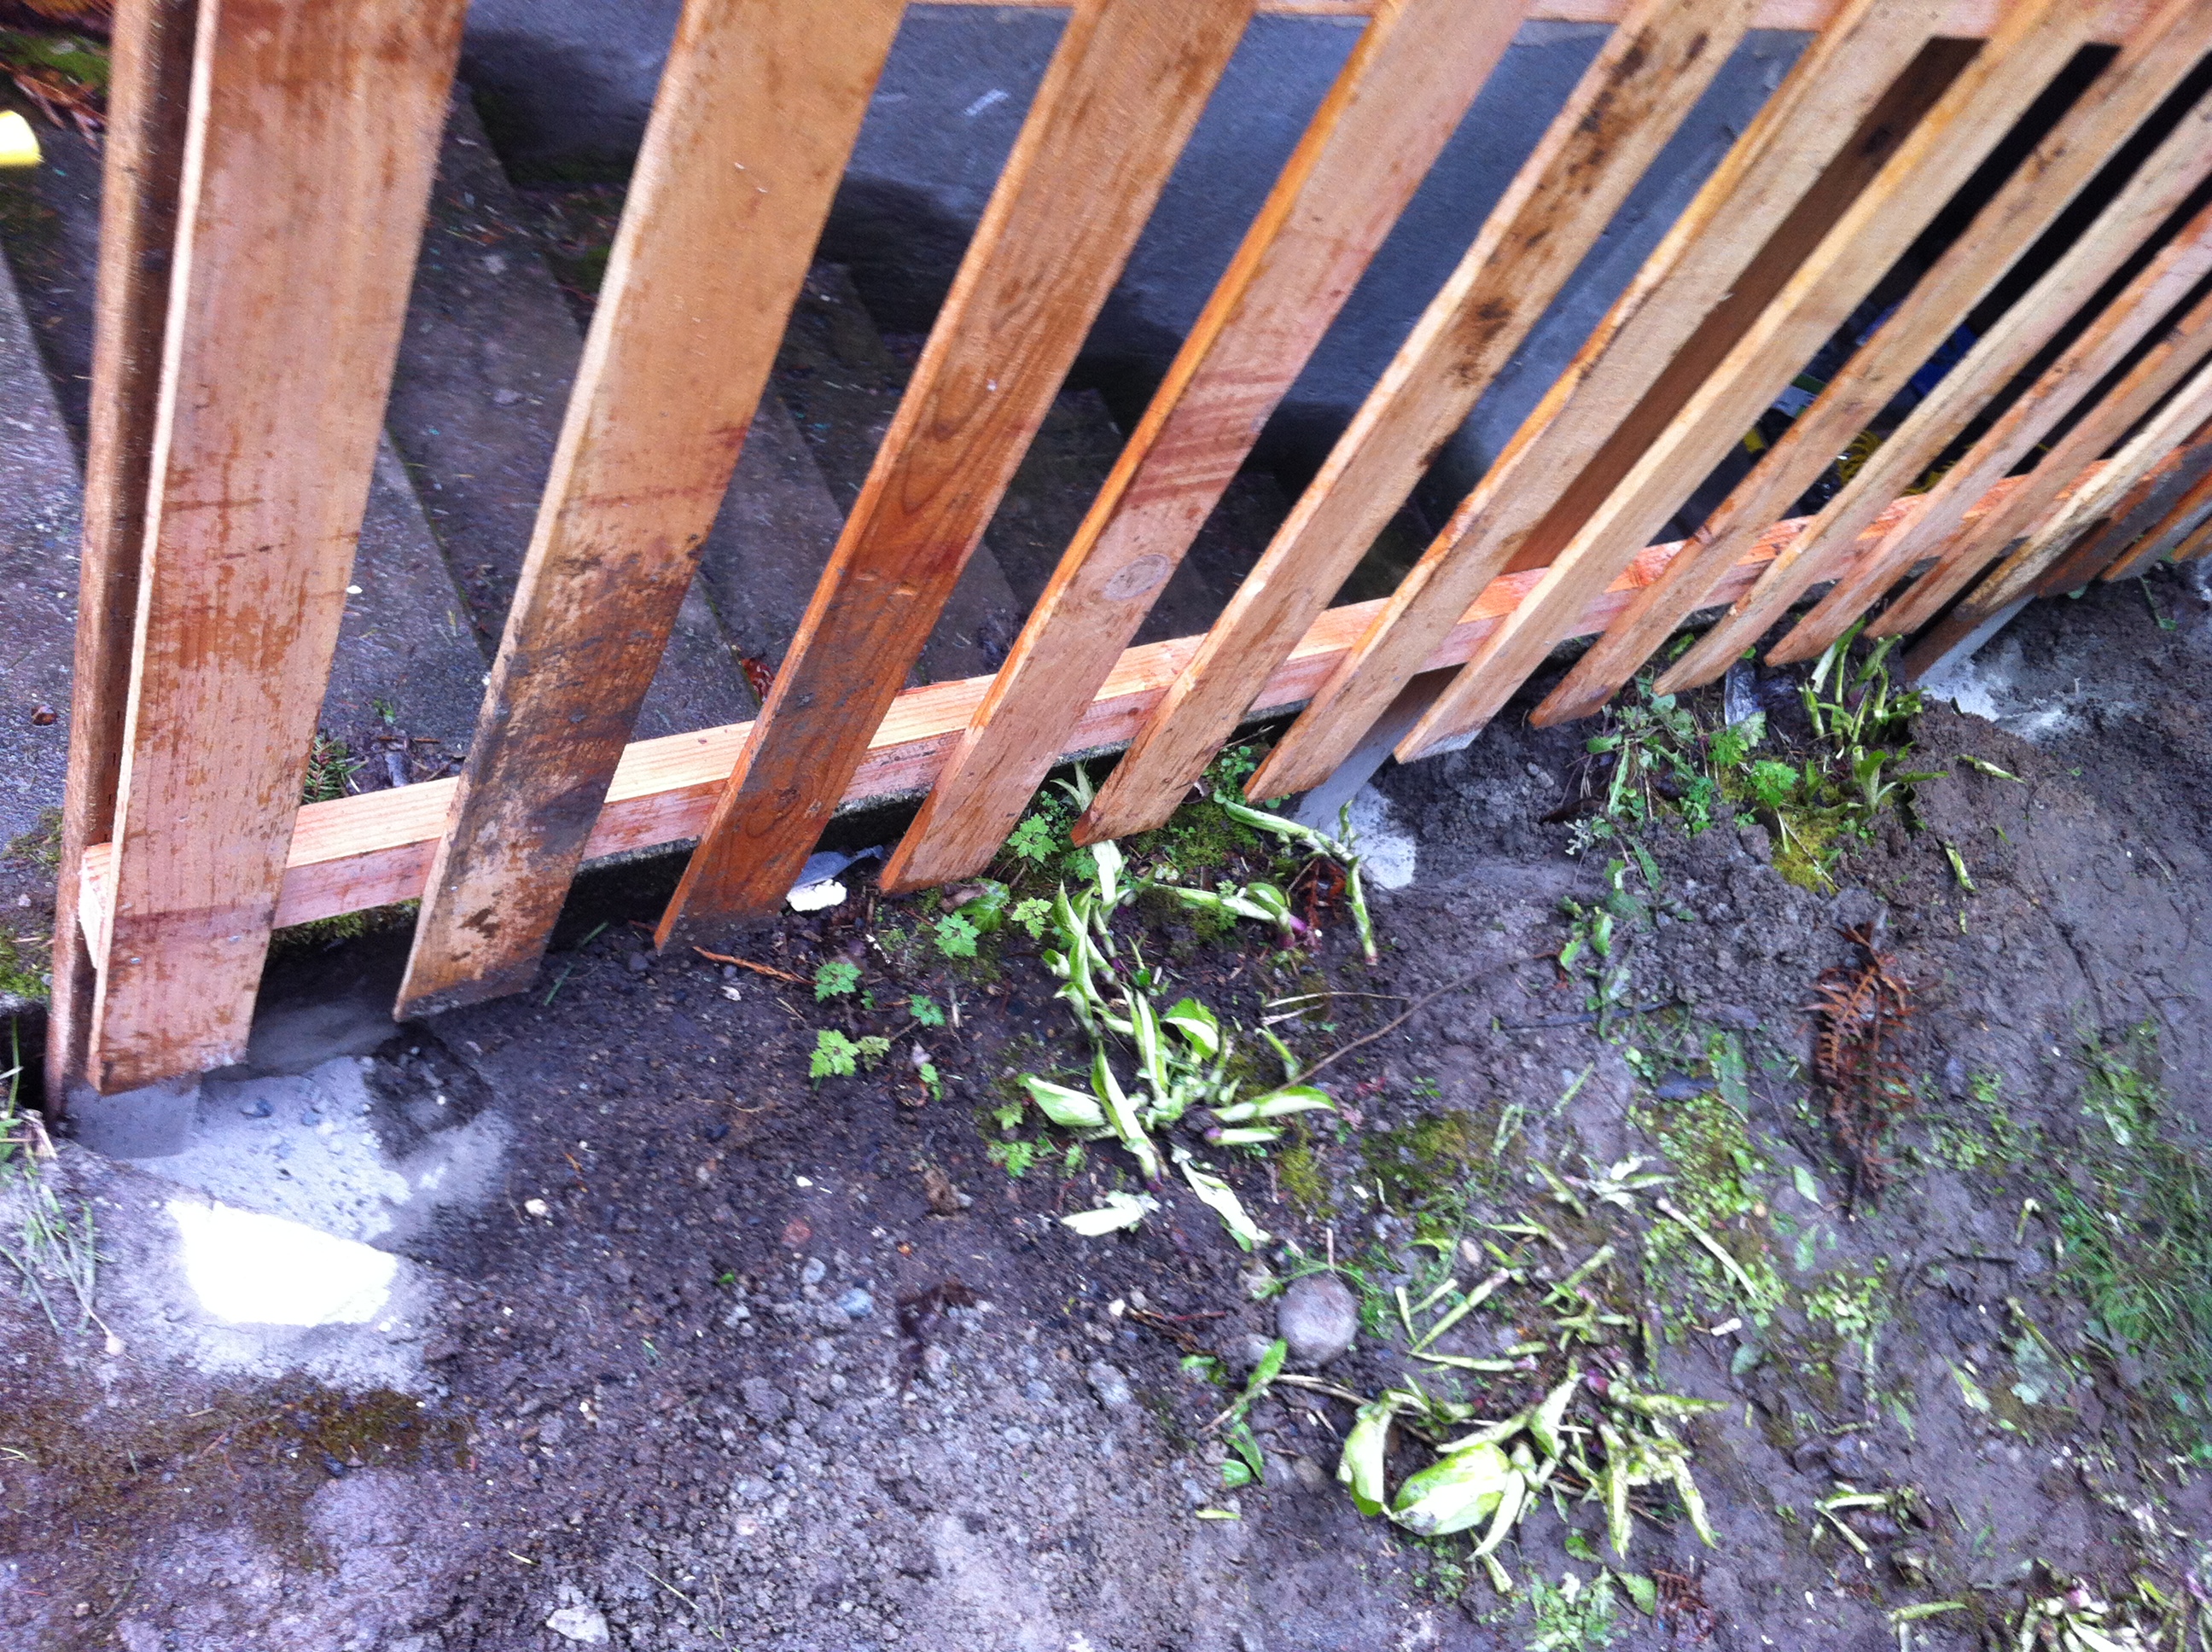
Here’s the original situation, with the chicken wire fence I originally put up as a stopgap a couple of years ago:

IMG_3780

Here’s the materials: two 8′ cedar fence panels and six 8′ pressure treated 2x4s, as well as gate hardware and deck screws. (I love deck screws, especially the ones with the specialty head that doesn’t cam out, and I will never never try to use those zinc-plated Home Depot screws again. Ever.)

IMG_3782

Holes are dug for the fence posts, about 20″ deep.

IMG_3787

The fence is assembled. I was able to do most of this on the shed/workshop floor out of the rain, but of course I mismeasured slightly so I had to go back and re-cut the ~2′ piece that extended the 8′ panel.

IMG_3788

According to Roger Cook, burying a length equal to 1/3 of the fence height should anchor it sufficiently, but I had a bucket full of concrete mix sitting around, so I poured it into the holes.

IMG_3789

And here’s the fence put up, with the holes filled in. It only wiggles a little bit, well within tolerable limits.

IMG_3790

I knew I would have to put the gatepost against the wall instead of suspending it off the end of the fence, but the downspout as built by Bob the Handyman way back when we bought the house was in the way. So I bought some tube and elbows and diverted it.

IMG_3793

And here’s the gatepost, built up out of 2x4s. And that’s where I ran out of time (and energy, having been working out in the rain all weekend).

IMG_3794

The following week, I was able to put up the gate. Unfortunately, the pickets did not fall in a good pattern for the necessary gate width, so I pulled them all off the rails and re-spaced them. Again, Home Depot screws suck, but I happen to have a box of galvanized roofing nails just the right size and used those to put the thing back together. Attaching the hinges and gate hardware was straightforward and easy.

IMG_3840

Last: the next weekend I replaced our faucet. Not only did the old one drip like crazy, but the replacement sprayer leaked whenever the faucet was on, causing a water-hammer-like shudder in the flow. So I looked around Home Depot for a better one, that had a single handle, ceramic cartridge, and pull-out sprayer, at a decent price.

IMG_3859

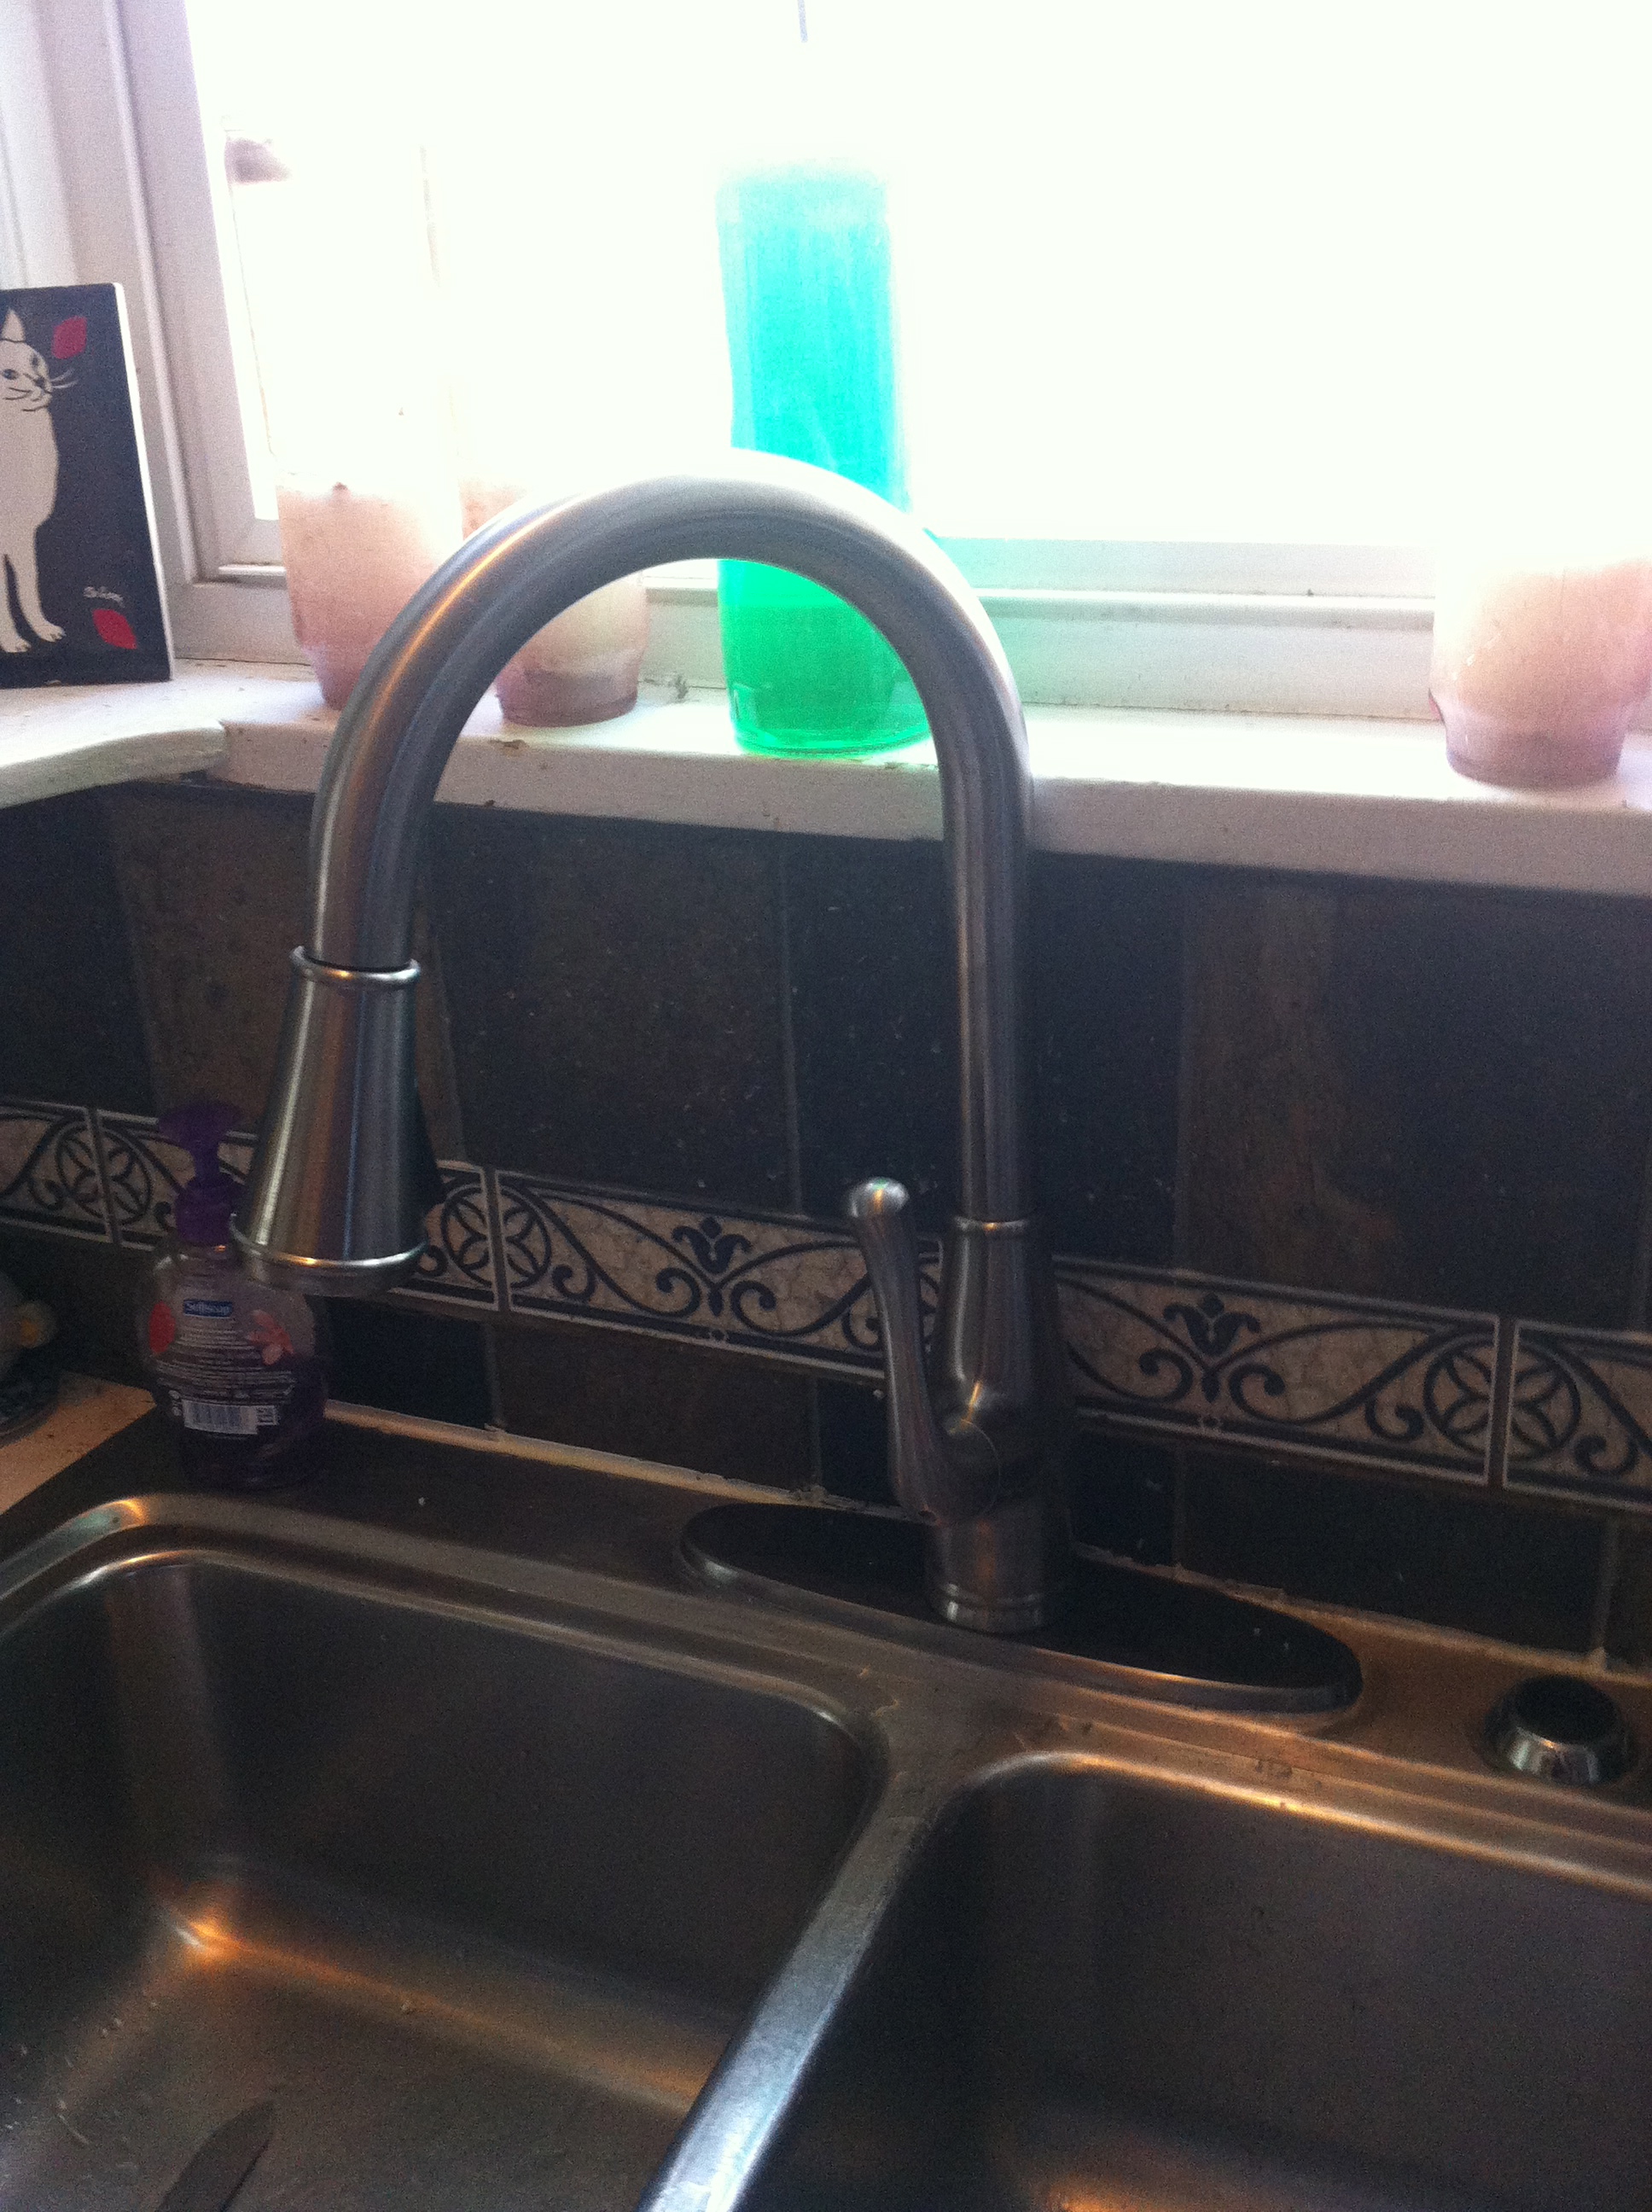
At first I installed it with the handle to the side like in the show model, but only after it was completely installed did I realize that the faucet was too close to the backsplash to allow for full motion of the handle. I took the whole thing out again and was about to pack it up and exchange it for a different model, when I noticed that there were little alignment flanges on the bottom that allowed for the handle to be in a front position as well as a side position. So I put the whole thing back in again.

Of course I got wet, and my arms got sore from working in gorilla-arm position, and at some point I dropped a screwdriver from arm’s length onto my forehead. Ow.

Next: Even though we’re planning to get rid of the garage, in the short term we want to keep the animals out, so I have to close off the old rotted garage door. I’ve had the composite panels since last summer, but I picked up the 2x4s at the same time as the gate stuff.

IMG_3785

I also got replacement siding to fill in the holes around the new windows and where I closed in the door from Thekla’s bedroom. It doesn’t quite match the 1930(?)-vintage siding on the rest of the house, but at least it won’t be tarpaper. I really want to rip all the siding off the house — vinyl and otherwise — and replace it with Hardiplank, but that’s going to be a long time from now.

Tags: , ,

Upcoming Projects

Here’s a list of smaller projects we’re contemplating for the near future. No particular order.

  • Finish work on hallway
  • Clean and organize basement
  • Build pergola roof
  • Seal up south shed windows and doors, run electricity to it, set it up as workshop
  • Wall in north shed rotted-out garage doors, replace rotted-out and falling-off person door
  • Run temporary lights and sockets to basement
  • Waterproof leaky parts of basement
  • Till and seed south raised area

Larger projects:

  • Replace the roof (we already have a contractor and estimate, just need to pull the trigger on it)
  • Build porch and re-route front entrance to existing closet (turning it back into a foyer/mudroom again)
  • Turn addition into master suite (this can be done in stages with the bathroom coming last)
  • Bump out back wall and enclose basement stairs into building envelope
  • Smart wire the house and create tech hub
  • Gut and refinish the library and living room
  • Retile the fireplace

“Someday” projects:

  • Finish basement, create laundry/plumbing room
  • Redo all the supply plumbing with PEX and a manifold system
  • Knock down the existing sheds, extend the foundations, and rebuild as garage & cottage
  • Replace forced air heating with radiant
  • Add a second story to the addition
  • Build a better patio
  • Redo the kitchen

Not that I’m going to be starting any of these right away, except maybe cleaning and organizing the basement. I really need a break.

Jen adds Yard Projects:

  • Clean out top bed and ready it for arborvitae planting
  • Continue building up the raised beds
  • Set the initial plans and start building my perennial garden
  • WEED! Oh goodness I need to weed. My beds are horrifically overgrown
  • Cut down strange bush/tree covering the library window

Tags: , , , , , , , , ,

No More Stairs

After all the adventures in plumbing, the next project in the queue was taking out the crappy stairs down to the basement. For reference, here’s a photo of the stairs:

Basement stairs, looking north. Headroom is 58"

Step 1: Knocked down the existing stairs. Pretty easy work with a hammer and a prybar. I really did this simultaneously with step 2, since it was easiest to install most of the joists while sitting on the stairs, but the last two had to be after taking out the stairs and lifted over my head. (Have I mentioned that I have biceps for the first time in my life?)

Step 2: Sister the cut joists with fresh 2x8s. I had to use pressure-treated wood since there is no sill plate on top of the foundation and the joists would be resting directly on concrete. And since I didn’t trust pure sistering, I cut them long enough to sit on the girder in the middle of the room. I followed Mike Holmes’ advice and glued and screwed them to the existing joists and toe-screwed them into the rim joist. This is where having the One Drill To Rule Them All really came in handy.

Step 3: Put down the subfloor. This step is a little out of order since I had to get it done before the in-laws showed up that evening; I would have rather done all the blocking first. I forgot to use adhesive on the joists, so I doubled up the screws to 6″ apart throughout.

Step 4: Take out the half walls around the edge. Easier said than done, because although each wall had only about three studs in it and could be wobbled by hand about an inch either way, they were put together with a really excessive number of 3″ screws.

Step 5: Insulate the rim joist using doubled-up pieces cut out of a 2″ thick Foamular 250 board for a total of R-20, and seal the edges with expanding foam. I made sure to take photos of every joist bay to prove to the inspector that I insulated, since you wouldn’t be able to see it after the next step.

Step 6: Install blocking around the edge of the subfloor patch to support the edges. Because of where the main water pipe runs under the old top of the stairs I couldn’t maneuver in notched 2×8 blocking, so I put in 2x6s against the subfloor and then cut and hammered in 1″-2″ pieces of the pressure-treated board to fill between the 2×6 and the foundation. It’s a little squishier than the rest of the patched area but well within tolerance.

Step 7: Cut a piece of birch plywood to act as a finish floor until we can afford to have the hardwood patched in and refinished by a contractor. I tried really hard to get an exact fit — I taped paper over the patch and marked the edge of the hole by crayon rubbing, and then cut out the template and transferred it to the plywood — but since I don’t have a jigsaw and it’s really rather difficult to match a wandering line with a circular saw, the patch is off by up to half an inch. Sigh.

Step 8: Rearrange furniture to suit.

And that’s where it stands today. There’s still a whole bunch of debris in the basement I haven’t lugged out to the ever-growing junk pile. And I’d like to stain the plywood “oak” color to match the rest of the floor, but I am stain-illiterate and I’m worried I’d make a huge mess for a crappy result.

Eventually, I’m going to build a new set of stairs where the old front entry/current walk-in closet is, but that’s going to require a hell of a lot of structural work, with steel posts and concrete saws and LVL beams and so on, not to mention lots of exacting finish carpentry. I have a good book on the subject, and I have a Google Sketchup model about halfway completed, but it’ll still be after next year’s tax return before I can even think of taking it on.

Tags: , ,