Archive for category Bedroom

Updates and Plans

Good heavens, I haven’t posted here in months!

I have several things going at once:

  1. More and better gardening
  2. Master bedroom conversion
  3. Kitchen bumpout

Gardening

I picked up a couple of books on vegetable gardening, one of which — Vegetable Gardening in the Pacific Northwest: A Timber Press Guide — was particularly good and useful. This year I’ve planted three tomato plants (regular/hybrid, roma, and cherry), which typically have been growing like crazy; possibly helped by the fact that I’m actually fertilizing them once a week. Around and under them I planted a line of beans (plus a trellis for them to climb) and two rows of radishes. The radishes seem to be taking longer to grow than I thought they would.

Last year’s all-marigolds bed is now one third dwarf marigolds (planted more densely, and ruthlessly deadheaded so they bloom more), about one-fifth tall marigolds planted from seed, which are about three inches tall and probably won’t bloom until late August, and the rest in sweet corn and beans, both of which are growing great so far. There’s also a cucumber plant and a zucchini plant that I put in three weeks ago, but which don’t seem to have grown at all. Maybe it’s not hot enough yet.

I pulled out all the weeds and maybe-strawberries from the back bed, and planted six for-sure strawberry plants and a raspberry bush. The book says that you need to clip the runners from the strawberries to make them put their energy into fruiting, but I actually want them to take over the whole bed, so I’m letting them run all over and I can wait for lots of fruit until next year. I believe the same is going to be true of the raspberry.

Last, I planted a container box with bunching onions and carrots, and put it up high so hopefully the low-flying carrot rust bugs won’t get to it. I’m really planning on eating the onions in their scallion form, but I’ll leave a few until late to see if they work out as actual onion bulbs.

Something I learned from the aforementioned book is that gardening isn’t just a summer sport around here. There’s lots of things you can grow literally over the winter even if you hate kale. I’m planning on planting garlic in September and harvesting it in spring sometime.

Master Bedroom

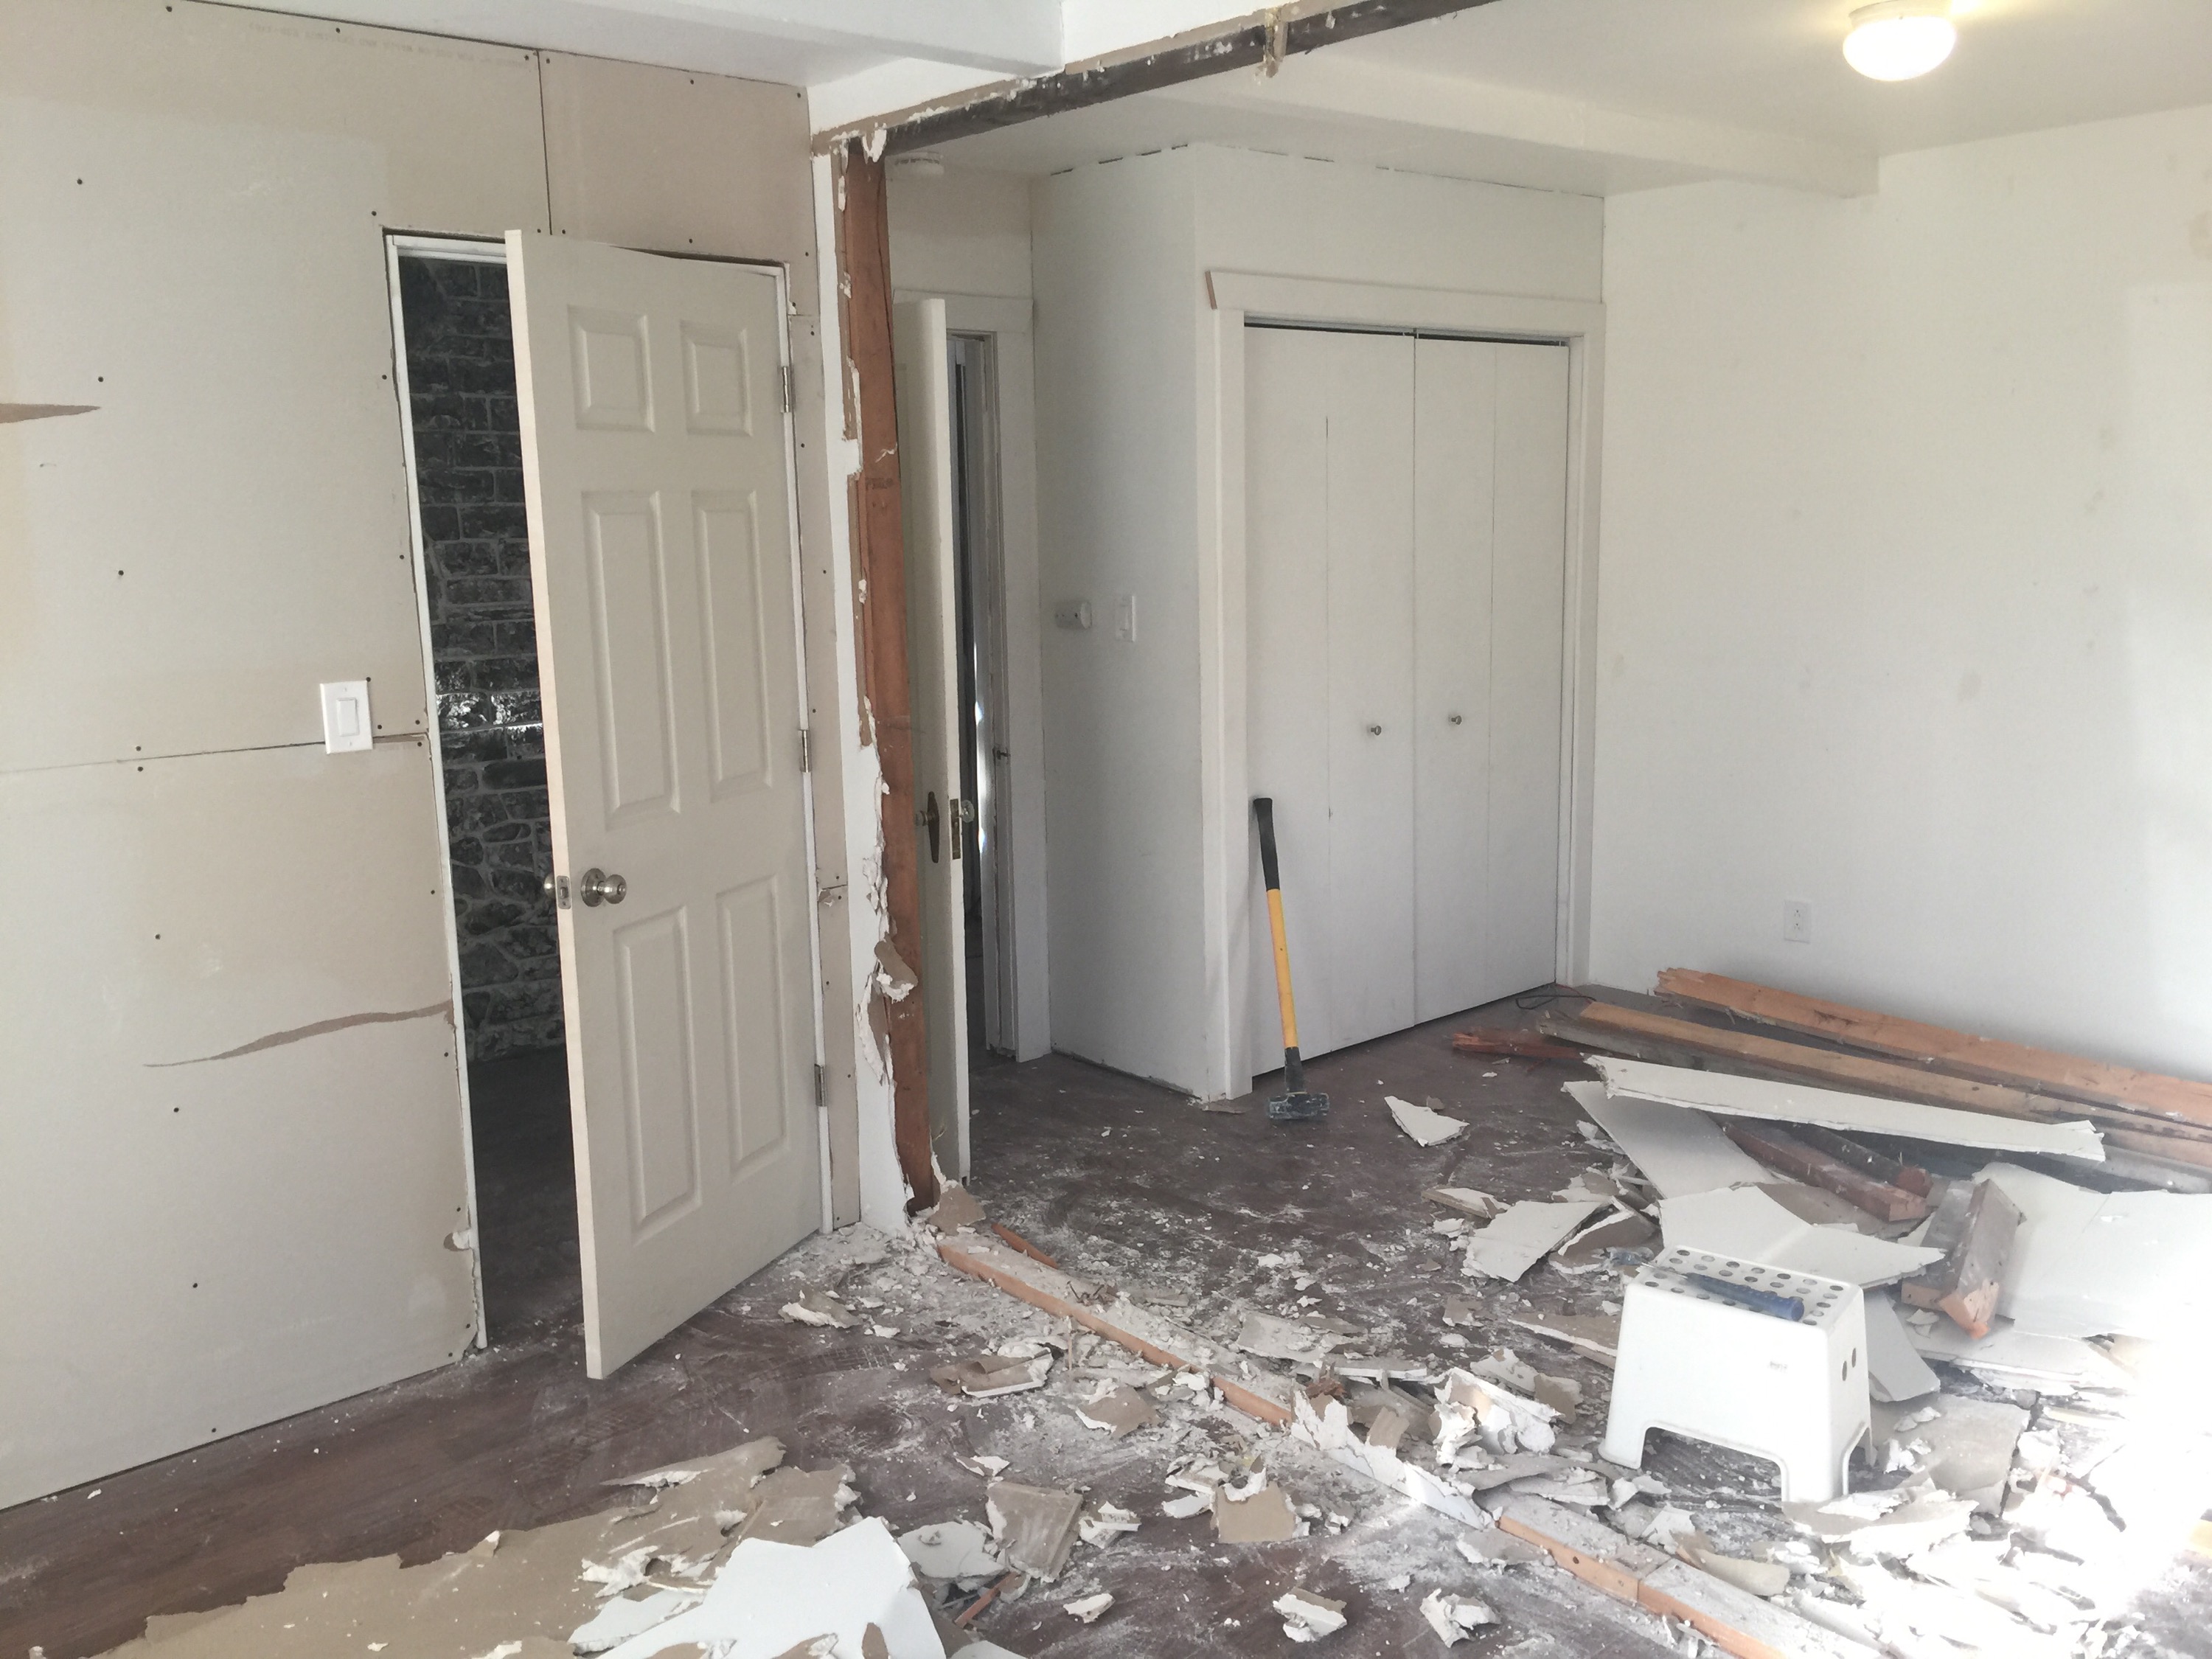
The 20’x20′ flat-roofed addition on the original gable cottage was originally (in the 1960s) a single open family room. At some point, probably in the 1980s, a previous owner partitioned off about 10’x16′ of it to make a separate bedroom. When I got divorced and got a roommate for a couple of years, I walled off 14′ of the remaining open space to make a bedroom for his kids.

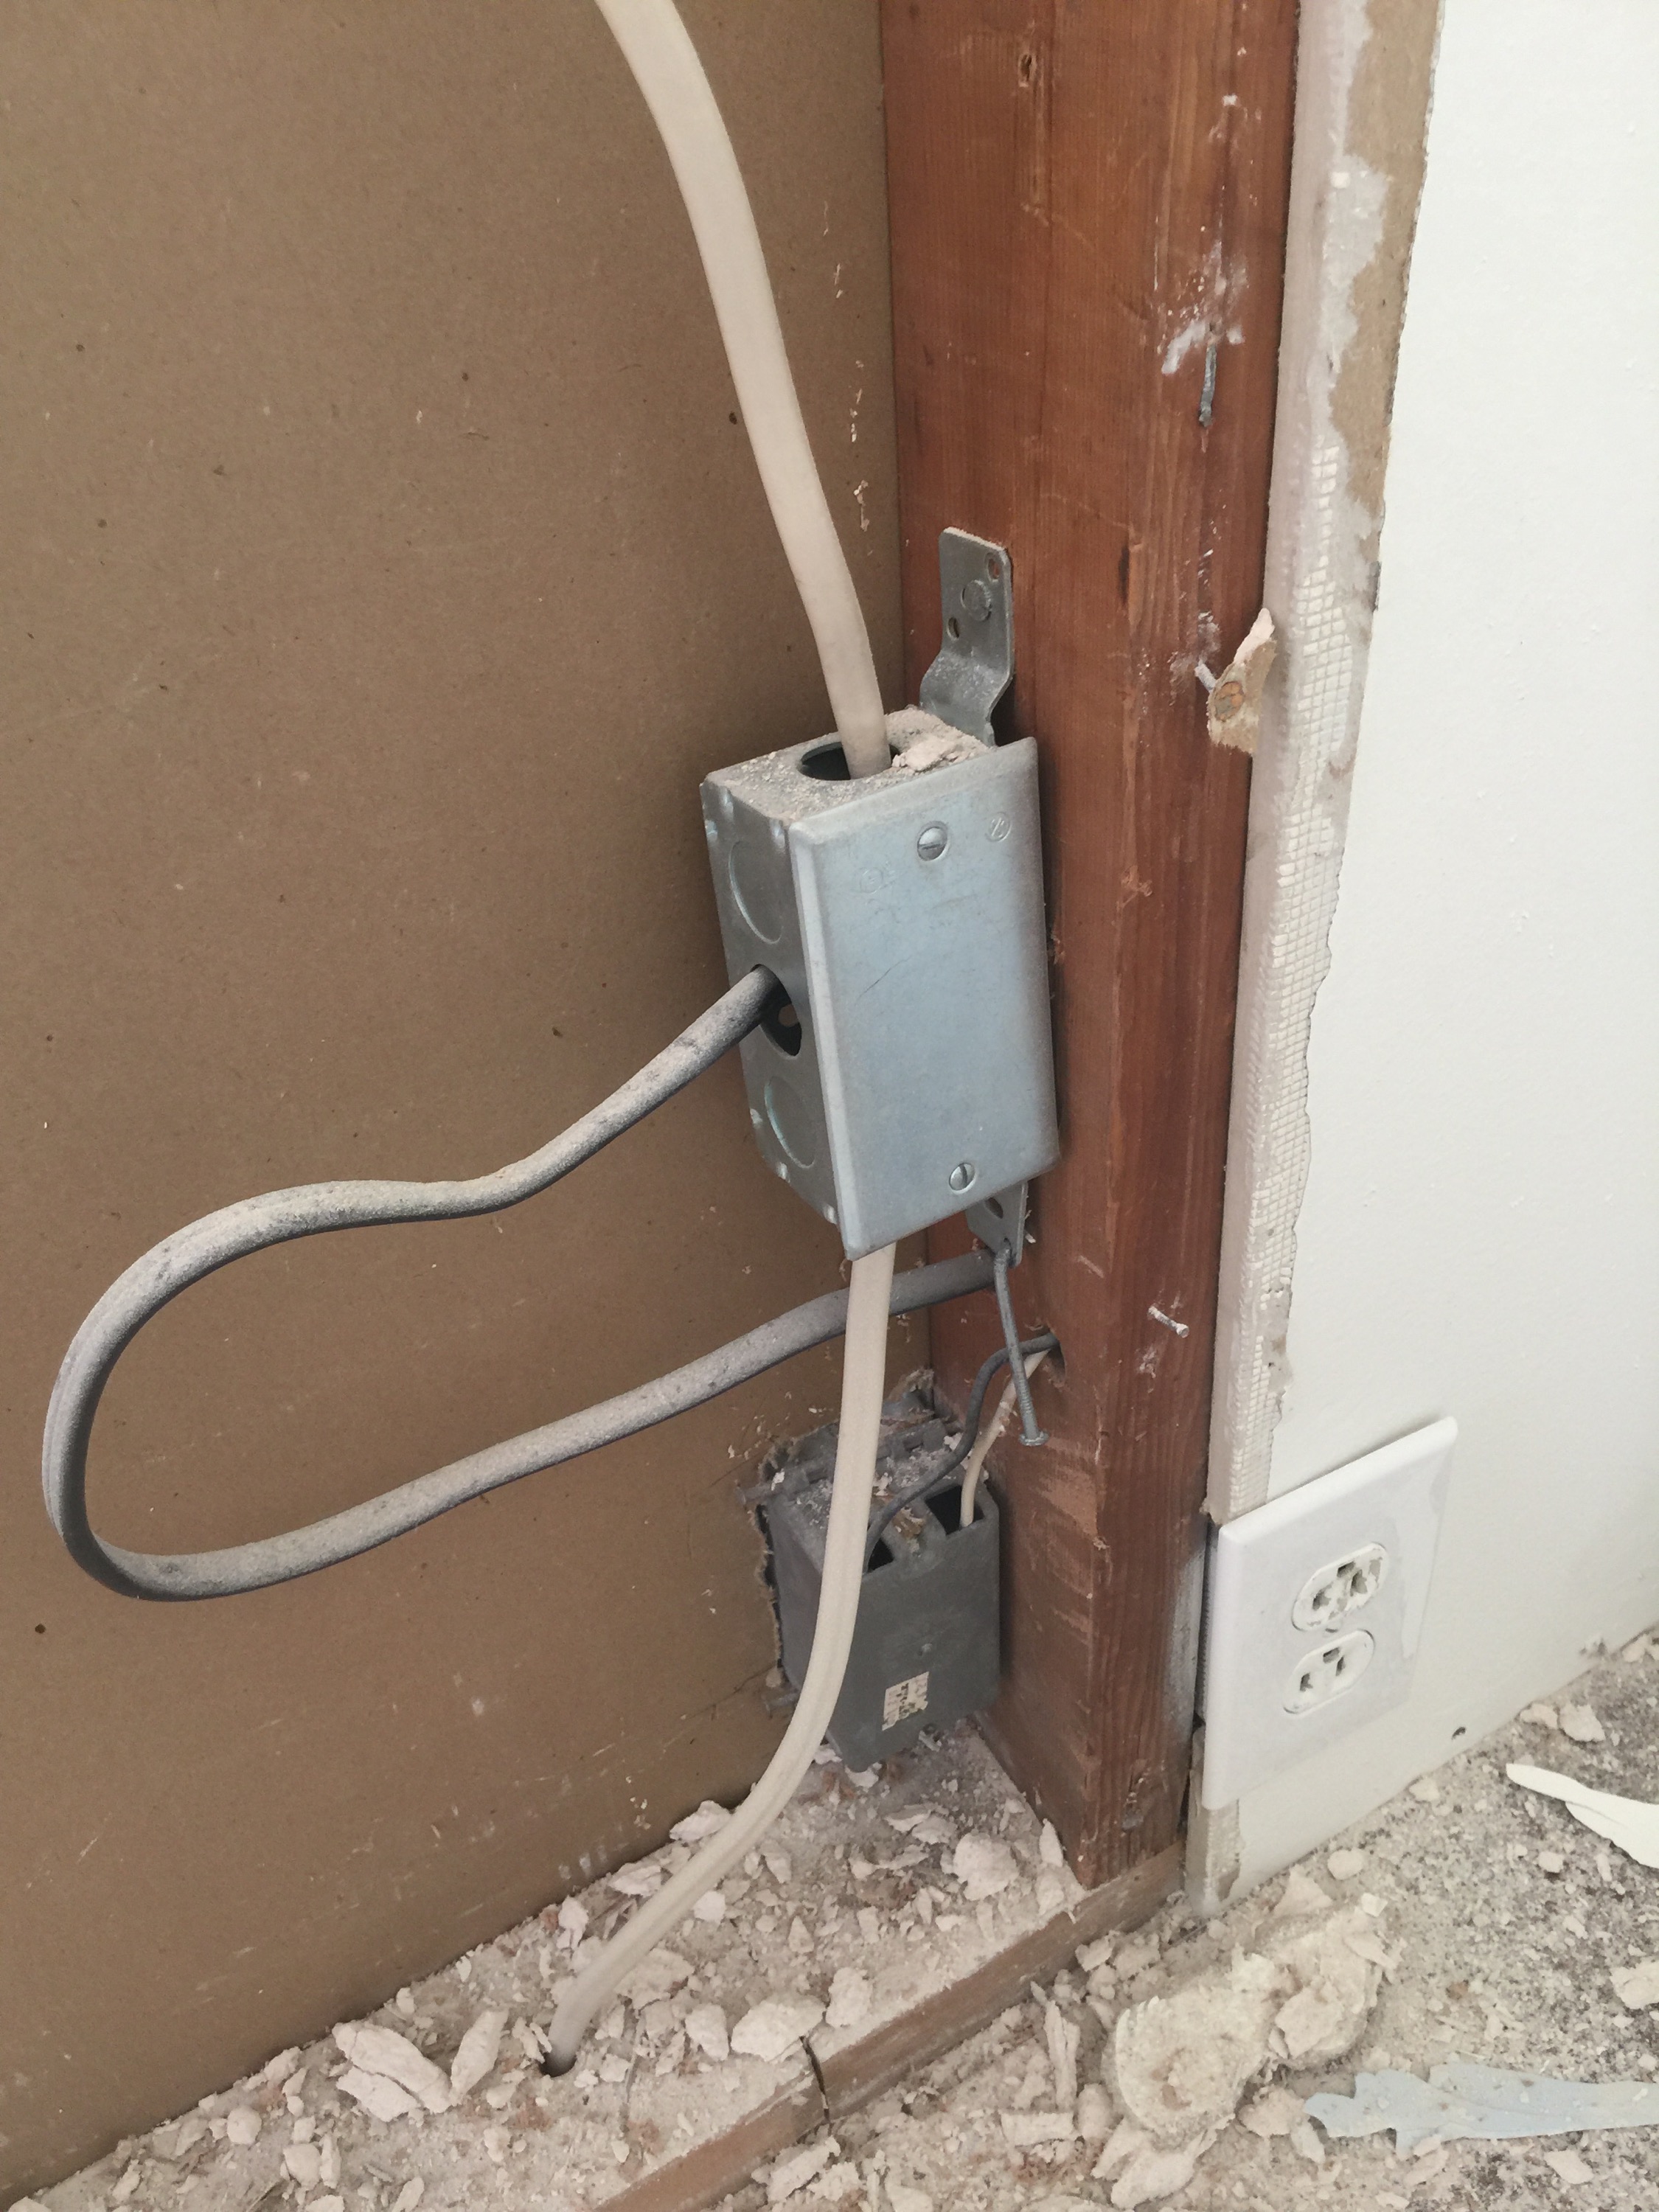
My ultimate intention for the addition is to turn it into a master suite, with bathroom and closet, but until I can do that I’m working on converting the two bedrooms into one 20’x14′ master bedroom. I’ve taken out the intermediate wall, drywalled over the kids’ room door, and resolved all the rat’s nest of electrical wiring (that I’m surprised hasn’t burned the house down yet). Now I’m in the process of patching the drywall and doing the mudding & taping that I never did before; then will come priming and painting and putting down new flooring, and then I’ll be able to move into it. So probably by Christmas, then.

Kitchen Bumpout

The big plan is to extend the back gable wall of the house out by 8′. Then I can build a new kitchen in that space, and then, when that’s completed, demolish the existing kitchen and turn it into a better dining room. Extending the existing space will let me have a straight staircase to the basement, better placement of the back door, even more windows than I have now, and most importantly enough room for a rationally-laid-out kitchen (no more ring-around-the-rosie around the cooktop/prep island if there’s more than one person in the kitchen).

To this end I refinanced the house (also got rid of my PMI) and took out a big whack of cash that is now sitting in a savings account ready to start being spent. All the contractors around here are reported to be super super busy with townhomes and McMansions, so I doubt that I’ll be able to find a design-build firm that will have time to help me. Which is okay, since I can do almost all of the work myself, it’ll just take longer.

What’s taking a long time right now is drafting blueprints. Once I have plans I can hire a structural engineer to review them and either suggest changes or sign off, and then I need to find a foundation contractor (I don’t think I can manage concrete). Once the foundation is done, I know I can do the framing, electrical, etc., and I’ll call the company that did the existing roof to apply the same special system to the new part.

It’s not clear if a bumpout of the basement plus ground floor is within the scope of a subject-to-field-inspection, but it it’s not then I understand it can take several months for approval, so I might not be able to start before next spring.

Seriously?!

At some point, you just have to wonder if the previous owners crossed the line from “blithering idiot” to “criminally insane”.

Since my roommate moved out, I’m going to break down the wall between his room (my old room) and his boys’ room (the former library, TV room, etc.) and make one big 20’x15′ bedroom. You can see the first step here:

However, just like when I tried to remove part of a heating duct last month, I find that I’m going to have to break the existing structure back further and further until I almost might as well just gut the whole thing right now.

For instance, inside the wall hidden by the door in the foreground, is this nonsense:

  
Hidden junction box, weird connector, individual conductors stripped out of the sheath and passed through holes, and (not pictured) wires in a notch between a 2×4 and the drywall with no protector plate.

I’m ever more convinced that the previous owners (ptui) wired up the addition with a bunch of 6′-8′ lengths of wire they got surplus and just connected together any old how. At least they’re not just wire-nutted together end-to-end hidden inside the wall, like I found before when I was wiring up the hall lights.

And it looks like they built the wall between the rooms and then put in the ceilings. There’s all this structure between the beams and attached to the roof deck up inside the ceiling, that to remove and insulate the cavity, I’m probably going to have to remove a couple of feet of drywall on either side of the joint. And pretty much rebuild the wall that’s got all the weird electrical in it as well.

Idiots!

Tags: , ,

Now it’s really done,

Yes, Bryan is the man when it comes to building, drywall, electrical.. you know.. the hard stuff. I am the queen of decorating and the bits and bobs portions of finishing a room. Though I had wanted to keep the room fairly gender neutral, when my daughter was given choices it led to more and more pink everything.

What you are about to see is what happens when you let three year old girls have a voice in room decoration.

It’s the room of pink fluffy cupcake eating sparkly unicorns of doom,

and then some.

You may want sunglasses.

I blame Pinkie Pie.. She’s Thekla’s current hero.

Upcoming Projects

Here’s a list of smaller projects we’re contemplating for the near future. No particular order.

  • Finish work on hallway
  • Clean and organize basement
  • Build pergola roof
  • Seal up south shed windows and doors, run electricity to it, set it up as workshop
  • Wall in north shed rotted-out garage doors, replace rotted-out and falling-off person door
  • Run temporary lights and sockets to basement
  • Waterproof leaky parts of basement
  • Till and seed south raised area

Larger projects:

  • Replace the roof (we already have a contractor and estimate, just need to pull the trigger on it)
  • Build porch and re-route front entrance to existing closet (turning it back into a foyer/mudroom again)
  • Turn addition into master suite (this can be done in stages with the bathroom coming last)
  • Bump out back wall and enclose basement stairs into building envelope
  • Smart wire the house and create tech hub
  • Gut and refinish the library and living room
  • Retile the fireplace

“Someday” projects:

  • Finish basement, create laundry/plumbing room
  • Redo all the supply plumbing with PEX and a manifold system
  • Knock down the existing sheds, extend the foundations, and rebuild as garage & cottage
  • Replace forced air heating with radiant
  • Add a second story to the addition
  • Build a better patio
  • Redo the kitchen

Not that I’m going to be starting any of these right away, except maybe cleaning and organizing the basement. I really need a break.

Jen adds Yard Projects:

  • Clean out top bed and ready it for arborvitae planting
  • Continue building up the raised beds
  • Set the initial plans and start building my perennial garden
  • WEED! Oh goodness I need to weed. My beds are horrifically overgrown
  • Cut down strange bush/tree covering the library window

Tags: , , , , , , , , ,

Stick a fork in it…

The @#$%@# bedroom is done. Well, almost done.


(The toxic pink curtains were my daughter’s idea — Jen showed her five different colors at the store and she picked that one. Also, the last photo shows the plexiglas protector to prevent the annoying orange cat in photo #3 from scratching holes in the corner again.)

Next on the agenda

  • Apply border
  • Wall plates for the plugs
  • Install door jamb and bifold doors for the closet
  • Install prehung bedroom door
  • Install window jambs and sills
  • Install casings 
  • Patch floor where old wall floor plates used to be
  • Fill and paint nail holes
  • Touch up painting
  • Install plexiglas corner protector
  • Clean old linoleum mastic off the floor
  • Move my daughter and all her stuff in
  • Cut hole and install heat vent

I’m not sure what I was doing wrong with the baseboards, in that there’s lots of gapping between the baseboard and the drywall. Is that something I should just caulk and call it good, or is there a better technique? Coping the corners wasn’t too hard, since I had a very simple profile, but I should buy an actual coping saw for the next time I do it.

I do know that I almost certainly won’t be using MDF for casings in the future. Yes, it comes pre-primed, but the primer doesn’t do all that great a job of holding the final coat of paint. Also, the edges aren’t square, it’s hard to plane, it doesn’t really hold screws very well, and it tends to bulge up around the finish nails (where wood doesn’t).

Now all I need to do is buy an inexpensive jigsaw so I can cut a hole in the floor above the existing heat duct for a vent grille. Which I should do soon, but which isn’t really necessary before I move my daughter into the room.


Tags: , , ,

Casings!

… and sills and jambs and doors and floor patches (oh my).

Lots of progress since the last post.

Two weeks ago I got the prehung door in, which was a bitch and a half to do solo. I plumbed it up and the door wouldn’t close. It’s a solid MDF core semi-custom Jeldwen door, so it’s pretty heavy. I had to do lots of adjusting and re-shimming to get the door to swing shut, and I didn’t realize until just yesterday when I was putting the casings on that it was actually seriously out of plumb, because the door was sagging in the frame on the top hinge. Once I did the thing with the long screw into the framing, it squared right up and I was able to re-adjust the frame so it was plumb. A little loosening of the screw adjusted the door so the latch would go into the strike plate. It’s a little tough to close, but completely within acceptable limits.

The closet door jamb was easy by comparison, and hanging the bifold doors was a snap. Unfortunately, they’re basic unfinished slab doors which suck down the paint, so I’m going to have to give it a third coat (at least) so as not to see dark wood grain through the white.

I also built the window jambs and sills. This proved to be difficult. I’m using MDF, so it doesn’t plane very well, so I had to resaw the boards to narrower and narrower widths on the table saw to get them to fit property. And for some reason I couldn’t get them tight to the window, so there’s about a 3/32″ gap that I’ll need to fill in with caulk.

Last weekend I built all the lintels. I knew I wanted to do a keystone design, but the problem was how to get a three-piece lintel to have nice tight joints and all be on the same level plane. I’ve been planning on getting a pocket hole kit for eventually doing built-ins and cabinets, so I went ahead and ordered this one and used it to mate up the lintel pieces with the keystone. I made a jig to make it a repeatable process, which I’ll keep around to make more in the future.

Yesterday I got the nailgun back out and put up all the door and window casings in the bedroom (I still have to do the simple casing on the inside of the closet).

The door and window casings in the hall will have to wait until I can saw or plane off a quarter inch of the existing jambs. They were built to be even with the old 3/4″ tongue-and-groove planks, so now that there’s 1/2″ drywall there’s too much jamb. Planing seems like it would take forever, but I’m not sure how to get a controlled saw cut. Maybe I need to buy a jigsaw.

Next week I clean up enough sawdust around the edges to put on the baseboards. I’ll be using 1/2″ x 5 1/2″ MDF boards, but I’m thinking that a square edge on top will be boring and tend to collect lots of dust, so I think I’m going to cut the top at a 45° angle. Yay tablesaw!

Also, back when the room was still open framing, one of our cats liked to use the closet corner as a scratching post. Unfortunately, the mere existence of drywall and paint on that corner didn’t discourage him, and he scratched a hole in the paint. I sanded it, patched with patching compound (I also patched the socket cuts where the hole was too big for the plate), and primed. When I do touchup painting, I’ll paint them, and then screw 4″ of plexiglas on each side up from the baseboard to higher than he can reach. Damn cat.

Jen’s had some luck in using mineral spirits and Murphy’s Oil Soap to get the mastic off the floor, starting in the hall. But nothing else we’ve tried so far has worked as well as the time I unknowingly spilled a bottle of air compressor oil on my way out of the room and left it there overnight. So maybe we’ll just get a big bottle of light oil, mop it onto the floor and clean it off the next day. Seems plausible. Right?


Next on the agenda

  • Apply border
  • Wall plates for the plugs
  • Install door jamb and bifold doors for the closet
  • Install prehung bedroom door
  • Install window jambs and sills
  • Install casings (mostly)
  • Patch floor where old wall floor plates used to be
  • Fill and paint nail holes
  • Touch up painting
  • Install plexiglas corner protector
  • Clean old linoleum mastic off the floor
  • Move my daughter and all her stuff in

P.S. Our friend Erin came over and painted clouds on the blue-sky ceiling. And they look gorgeous.

Tags: , , , , ,

Second Bedroom Gets Closer to Done

Five weeks ago it looked like this:


Four weeks ago it looked like this:


The white stripe is where the boundary masking tape went. It’ll be covered up by a self-stick flowers-and-garlands border we got from Amazon.

Two weeks ago it looked like this:

Look! Lights and plugs!

The upstairs storage area is lighted as well.

Next on the agenda

  • Apply border
  • Wall plates for the plugs
  • Install door jamb and bifold doors for the closet
  • Install prehung bedroom door
  • Install window jambs and sills
  • Install casings
  • Patch floor where old wall floor plates used to be
  • Clean old linoleum mastic off the floor
  • Move my daughter and all her stuff in

Lessons Learned

If you have a 10′ wall, don’t try to cut down a single piece of 12′ drywall. There’s no way to get a tight fit and maneuver it into place, and plus you’ll crunch all the corners. Instead, just accept that you’ll have butt joints to mud and feather with the tradeoff that you won’t have big gaps at the edges to fill.

Tags: , ,

Still Here

Right. The earth did not open up and swallow us whole along with our house.

The back bedroom project is still underway, though. After gutting it back in March and April, we pretty much ran out of time and money. In May I was able to get all the framing done: I filled in the existing exterior door, framed two windows, added a real closet, and created a rough door opening where the end of the hallway once was. In June or thereabouts I was able to buy a roll of wire and run the almost all the electrical. And there I stopped for a couple of months.

Luckily, Jen had some stock options from her job that became sellable in August, so we finally had the money to get all the remaining stuff. Last week I took advantage of some time off work and finished the rough electrical and had it inspected (passed except for one minor issue with the closet light fixture placement). I also installed the folding attic stairs (I was able to do it entirely myself with the assistance of our drywall lift — thanks Jen!)

This morning, I went to Home Depot and ordered all the plywood, drywall, joint compound, doors, tar paper, light fixtures, switches, receptacles, etc. that I’ll need to complete (almost) everything. It gets delivered on Tuesday, so I get to spend this weekend doing everything that I can get done short of having the materials on hand: clean up the room, fill in all the floor/ceiling holes with firestop foam, pull the vinyl siding off the relevant sections of wall, flash the rough window openings, etc.

No pictures for this post, but I’ll take plenty as I work on everything next week.

Tags: , , , , , ,

Bedroom Remodel Weekend 1

Last weekend I started on the back bedroom/hallway project. The plan is:

  • Gut down to the studs
  • Frame in the door to the outside
  • Add a window to that wall
  • Take out the existing closet wall and move the doorway back to the bathroom wall
  • Add a real closet and a reading nook
  • Rewire properly
  • Add attic stairs to the hallway ceiling
  • Lay down a plywood floor in the attic for storage
  • New drywall and moldings

Before

Saturday we had a lot of social appointments, so I only had time to pull down all the trim and moldings.

Casings down

Window casings too

Sunday I got out the big prybar and framing hammer and took down all the tongue and groove boards on the walls. I’ve pulled all the nails out and I’m hoping to be able to get something for them on Craigslist.

The hallway

The closet

Outside walls

Kitchen wall

Interestingly, the shared wall to the kitchen shows two framed-in doorways, one narrow and one normal size. I suspect that originally the hallway ended in a linen closet and the access to the back bedroom was through the kitchen approximately where the wall ovens are now. Supporting this theory is the fact that the vertical framing around the current bedroom doorway is kinda rough-sawn and that the stud on the kitchen wall opposite the end of the bathroom wall has lots of nail holes in it.

Oh, and also, apparently nobody who ever worked on this house ever heard of a header over windows and doors. The existing doorway is non-load bearing and so doesn’t need one, but the existing window, outside door, and framed-in doors on the kitchen wall are all on exterior or load-bearing walls. None of them have any more than the top plate 2×4. It’s a wonder this house isn’t sagging more than it already is.

Sometime this week I’ll take an hour and pull down and bag up all the blown-in insulation in the walls. Then next Saturday I knock down the closet wall and pull down the ceilings. That means a huge pile of rockwool insulation on the floor so that might be all I can get done in a day.

Pulling nails amid the pile of junk lumber

I also need to get my permit renewed so I can be all proper and legal.

Tags: , , , , ,